Monday, 19 January 2015

Bitmaps Vs Vectors

Yay, this is fun. This is one of the topics that I believe most people get involved in photography for.

Bitmaps are exciting, bitmaps are like images, shapes or graphics made up of pixels, thousands or millions of pixels, imagine that. Millions of tiny little blocks all working together for the bigger picture.

But their not just little blocks you see, they have little personalities, little aversions and preferences. You see if you stretch a bitmap image all of the edges start to pixelate and look like a stair case. Some people generalise and call them bad names and berate bitmaps for being bastards when they stair case, but they don't understand that their just all working together to make the image look bad, it's like a little cry for help. Why can't you just accept us for who we are ? why do we need to change ? remind you of anyone ? Their all working together so you just let them be. Amazing isn't it, their just stretched too thin very easily. However, even though their hard to work with they have amazing advantages, photographs are essentially bitmap images. If you convert a photograph to a vector it just looks like a cartoon. But bitmaps, although they're hard to work with they definitely come with their advantages. Working with bitmaps is a bit like being Clint Eastwood's boss in Dirty Harry. You don't like the way they don't toe the line and follow all the orders but goddam your glad you've got them.

Vectors, when working with a graphic or shapes are without doubt the better format to work with. Vectors aren't made up of pixels, they're essentially made up of lines and mathematical equations allowing you to stretch them infinitely without ever losing quality. They are like people without emotions, you can stretch them to the limit. Their file sizes are smaller too, although they do take up more processing power. Have you ever seen despicable me ? the villain called vector? Vector graphics have essentially absolutely nothing to do with him, other than the fact he's good at maths.

However, a big drawback to vectors is that you can't use them in photoshop, they sort of just convert to a bitmap image and are made up of pixels all of a sudden. Vectors are really only used for designing graphics, logos, leaflets, websites and the like. Bitmaps on the other hand aren't very useful in this area because they aren't as flexible.

The important distinction to make here is that anything thats created with pixels is a bitmap, things like jpegs, gifs, bmp's. Common file formats for vectors are xml's, eps's, svg's, essentially all kinds of weird formats that, if you are a photographer at least, you hope never to see in your life. I guess, it's kind of like driving a car and hoping never to see a cyclist. I mean their there and your glad that they exist in the world, compensating for all of the things you, as a driver aren't currently doing, but you just hope not to see them because they kind of might get in your way. I do however, even as a driver like to see cyclists. It refreshes me, I like that people cycle and are doing good for themselves and the world. I kind of like to remove the boundaries between me and everything else and live in kind of a subtle and blissful oneness of it all, where there is little distinction between you, yourself and the cyclist over their in the rain, it's kind of like we're all in this together ? you know ? I'm driving because I have a young daughter and most of the time have too but at the same time the cyclist doesn't and instead of just sitting on his back, she's using that opportunity to better the world and them-self whilst just living out there in nature you know ? their stoicism inspires me, even though I can remind myself I do the same thing on a run sometimes, in the wind and the lashing rain I still feel their stoicism you know ? it still feels good to me ? I guess I was just trying to create a metaphor from the general perspective to help you understand, because I care about you too ? you know ? However, still as a photographer, I hope never to see an SVG file. Do you understand ?

So there you have it, Vectors Vs Bitmaps.

Vectors are based on Mathematical equations and so don’t alter or show pixels when you stretch them or zoom in. (vector data) 

Use more processing power than bitmaps
Made up from lines equations and calculations 
Individual elements can be grouped 
images are more precise than bitmaps
take up less memory than bitmaps

take up less storage than bitmaps

Bitmaps are of a specific size and don’t stretch well, they also show “stair case edges” when you zoom in. (raster data)

Use less processing power than vectors


Tuesday, 16 December 2014

Lines in photography


Lines play a huge role in photography and can be used for numerous purposes. By replicating the three dimensional world through a two dimensional medium, depth perception is lost  and so lines are a very important tool for recreating  a sense of depth and perspective. 


It’s important to note, that lines are not exclusively produced by actual physical lines in a photograph like below: 

A HDR I took in Manchester City Centre
Lines can be much more subtle. For example, they can be created by a contrast in colour tones, a contrast between light and dark focused areas of the image and more.


Diagonal lines  

in the western world we have a tradition of reading from left to right and when viewing a photograph we use a similar process, Scientists have discovered that when western people look at a photograph or a piece of art, we start at the bottom left corner and work our way into the rest of the image. In Asia the process begins from the opposite side, as they are trained to read from right to left. Using diagonal lines in a photograph to lead your viewer from the left in towards your subject is a great way of utilising this fact. Lines used in this manner are often described as leading lines. 

In the image below I used a blur tool over most of the ocean to reduce the focus, however I (used a mask on the layer I applied the blur with and) created a path between the bottom left of the image and the boat, allowing that part of the image to remain in focus. Which in turn created a leading line for the viewer to follow from the bottom left of the image towards the boat and into the rest of the photograph:

Lake Geneve, Switzerland
When numerous diagonal lines are used in an image they can be arranged so as to simulate a feeling of action within the image. 


Horizontal lines


Horizontal lines, especially when they span the full length of an image can convey feelings of calmness, stability and peace. They remind us of great horizons and vast expanses of water, however horizontal lines can be boring when unbroken. Although, this is easily solved by the addition of intersecting vertical lines of some form. For example, the way the colourful sails below break the line of the horizon. 

Dorset, UK

Another trick to accentuate horizontal lines, used in the image above, is to shoot landscape or even wider so as to prolong their length and exaggerate the feelings they can convey. 

Vertical Lines

Vertical lines are known to provide a sense of growth or power within in image. However they can also give a sense of rigidity to an image where as horizontal lines are more free flowing. 

The affects of vertical lines can be accentuated by shooting in portrait and also by configuring your composition to crop the lines before they end, this can give the viewer the notion that the subject is too big to be captured and provide the subject too with a sense of grandeur or strength. See how the tops of the trees have been cut off in the image below:

New Forest, UK

Thanks for reading ! Feel free to check out my website at: www.josephrigbyphotography.co.uk

Clone Stamp Tool

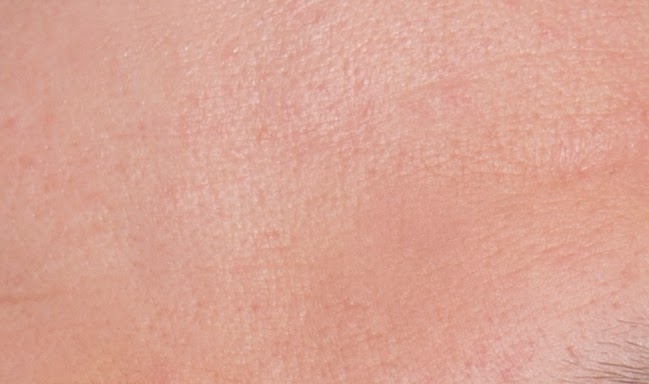
The clone stamp tool is a photoshop tool that allows you to, in affect to very quickly and easily copy one area of an image and paste it onto another area of an image. Below are a couple of images i have produced to show how well it can be used.

Here is an image of somebody's forehead with a tiny bit of eye brow in the bottom right I included for context.


These two images represent how the clone stamp tool may be used, the top image is pre-use and the lower image is after-use. Although I am using it here for portraiture work it is possible to incorporate anywhere. 

The basic controls are as explained below:


1) Select the icon as shown: 


2) Hold alt and click - to select the part of the image you would like to clone

3) let go of alt and click on the place you would like the cloned part of the image to be pasted.

Finished

However, you can improve the effectiveness of the tool by incorporating the use of brush sizes, hardness, softness and layer modes etc to tailor the results to your own needs.

Thanks for reading ! Feel free to check out my website at: www.josephrigbyphotography.co.uk

ISO and The Exposure Triangle


The exposure triangle is made up of three determining factors that control how much light a photograph is exposed to. It is important to understand these factors both individually and hoe they work as a unit to achieve any level of skill in photography. I will begin by explaining these factors individually:

Aperture: 

In each and every lens there is a hole through which light travels to reach either the film or the cameras sensor (if digital) in order to expose an image, this hole is called the aperture. The amount of light that can travel through a lenses aperture in X amount of time is dependant on the apertures diameter. Apertures with wider diameters allow more light to travel through them and smaller apertures allow less light to travel through them. 

Most lenses have variable diameters which means the size of the aperture is a controllable factor in determining the exposure of a photograph.

To help stop your brain from over working i’ll repeat it simply. In a lens there is a hole, if a hole is wider more light goes through it and if it is smaller less goes through. You control the size of the hole and how big or small it is affects how light or dark your image will be. The hole is called the aperture. 


To help your brain even more i’ve included some images below:

Aperture f/4

(smaller)

Slightly darker image


Aperture f2.8

(wider)

brighter image


You might be wondering what those units above mean; they are called F stops and are the unit of measurement for the size of the aperture. It is likely you will see them at any of the following measurements:

f/1, f/1.4, f/2, f/2.8, f/4, f/5.6, f/8, f/11, f/16, f/22, f/32, f/45, f/64, f/90, f/128, etc

Contrary to natural intuition (because things would be too easy otherwise) the smaller the number of measurement, the wider the aperture is. For example f/1 represents an aperture that is very wide and lets in a lot of light. Where as f/128 represents an aperture that is very very small and doesn’t let much light in at all. So small aperture = high number and bigger apertures = lower number.

For any mathematicians amongst us the f number N is given by: 

N = F/D where F is the focal length and D is the diameter of the aperture. So f/1 on a 50mm lens means the diameter of the aperture is 50mm or 5cm. 

The size of the aperture also affects an images depth of field but this isn’t related to exposure and so i’ll leave for another blog.

2) Shutter Speed

A cameras shutter is like a small curtain that lies in front of the film or the sensor. The curtain opens when a photograph is taken to allow light into the camera in order to expose the image. The longer the shutter is open the more light can pass through. Usually the shutter only needs to be open for very short amount of time i.e. 1/200 of a second but in low light or to create certain effects a cameras shutter can be open for much longer periods of time i.e. 1 minute or much longer and this is when a tripod is needed to keep a camera steady. 

Below are a few images to display what affect the shutter speed have on the exposure of an image:


Shutter speed:

5 seconds

f/11

ISO: 100
Shutter speed:

20 seconds

f/11

ISO: 100 
 3) ISO

ISO is a digital sensors or a films level of light sensitivity. The higher the ISO the lighter your exposed image will be and the lower the ISO the darker it will be. A downside to ISO is its tendency to increase the noise of an image, the higher the ISO the more noise that will be created.

Each camera has a base ISO level that tends to 100. The ISO of film stock is built into the film when its made and can’t be changed. After ISO 100 the value goes up in geometric progression, meaning it doubles each time from ISO 100 to 200, 400, 800, 1600, 3200, 6400, 12800 and so on. It’s important to know that each progression represents a doubling the cameras or film stock sensitivity. I.e. ISO 200 is twice as sensitive as ISO 100 and ISO 800 is quadruple as sensitive as ISO 200. (finally something that makes a little sense)

However, the higher a camera sensors top ISO value, the lower the noise will be at any given value. For example, if a cameras top ISO value is 1600 then at ISO1600 on that camera there will be much more noise then ISO 1600 on a camera that has top ISO value of ISO 128,000 below I have included an image that displays the noise of a high ISO image. 

 ISO 3200

Below I have included a cropped version of one of the posters seen in the image to the left in order to display the noise that a high ISO can produce.

However, admittedly this was taken on a camera (5d Mark 3) with great light sensitivity so the noise impact at ISO 3200 is reduced from the usual amount.


Conclusion

With each changing setting, situation or assignment the priorities of a photograph change. A skilled photographer is able to meet these changes and one of the most rudimental skills in photography is to be able to balance the exposure triangle in a way that suits your needs. There are several ways to reach the same exposure value and below are some theoretical examples to assist you on understanding how you can utilise this fact.

For example, if you are on a journalistic assignment taking snapshots of a person or an event with the need for everything to be in focus and also too little time or flexibility to carry around and set up a tripod, the best thing to do is increase your ISO. This will allow you to take photographs with smaller apertures (with more in focus) and at faster shutter speeds. 

Or, if your taking a beautiful landscape and want everything in focus ( small aperture) when the light is low and you have bags of time and a tripod at your disposal. Here, there is no need to make any sacrifice in the quality of your image by increasing the ISO. Instead you can keep your small aperture (around f/16 will keep most things in focus) move your ISO down to it’s base level (ISO 100) and put your camera on a tripod for a long exposure. This allows a long time for the light to travel on to your film stock or cameras sensor and can produce a well exposed image. 

For the last example, if it’s bright daylight and you want a shallow depth of field( achieved with a wide aperture i.e. 1.4) but theres your image is over exposed, you can keep a wide aperture and compensate by moving your shutter speed up to a very short amount of time i.e. 1/8000 of a second.

Thanks for reading! feel free to check out my website at: www.josephrigbyphotography.co.uk

Sunday, 7 December 2014

Colour Temperature Explained

Colour temperature is a description of the colour of light, and more specifically the colour of a source of light on spectrum of blue to orange. With candle light producing a warm and orange hue falling in at around 1800K and daylight being much cooler and bluer, falling in at around 5500K (The unit of measurement I am referring to is the Kelvin, denoted by its symbol: K). Much cooler light than daylight will measure in at much higher Kelvin numbers i.e 7000K-10,000K and warmer light at much lower kelvin numbers i.e. 1000K-3000K. All light will fall in the range between 0K and 10,000K. 

Here is a diagram of it’s spectrum:


However, when managing the colour temperatures of your images, cameras don't always have to be balanced to produce accurate results, if you set your camera to 1800K for example, it will think it is shooting at candle light. To compensate for all of the orange light that comes from candles it will add lots of blue to the image so that any white in the scene still appears as white rather then turning orange from the candle light. However, if you tell your camera to shoot at 1800k when really you are shooting with incandescent light at 2800k it will cause the scene to look more blue then it is in real life. The reverse of this phenomenon is also true. If you shoot at 10,000k when really the colour temperature of your scene is 7000k it will give the scene a warmish hue. I have provided some extreme examples below.


Playing with the colour temperature on your camera setting is a great tool to get creative with the colour of your images, slightly altering the hue of your shots can also help to provide some context or give meaning to your images. The same is true for colour balancing your shots on the pink to green scale, not only orange to blue. 

Thanks for reading ! Feel free to check out my website at: www.josephrigbyphotography.co.uk

Low key Lighting - Photography

Low Key Lighting

Low key lighting is a style of lighting that tends to be arranged with the purpose of creating dramatic and moody effects. Where the lighting ratio of a high key set up can be approaching 1:1 it isn’t uncommon for a low key set up to have a lighting ratio of around 1:8, creating large amounts of contrast and shadows. 

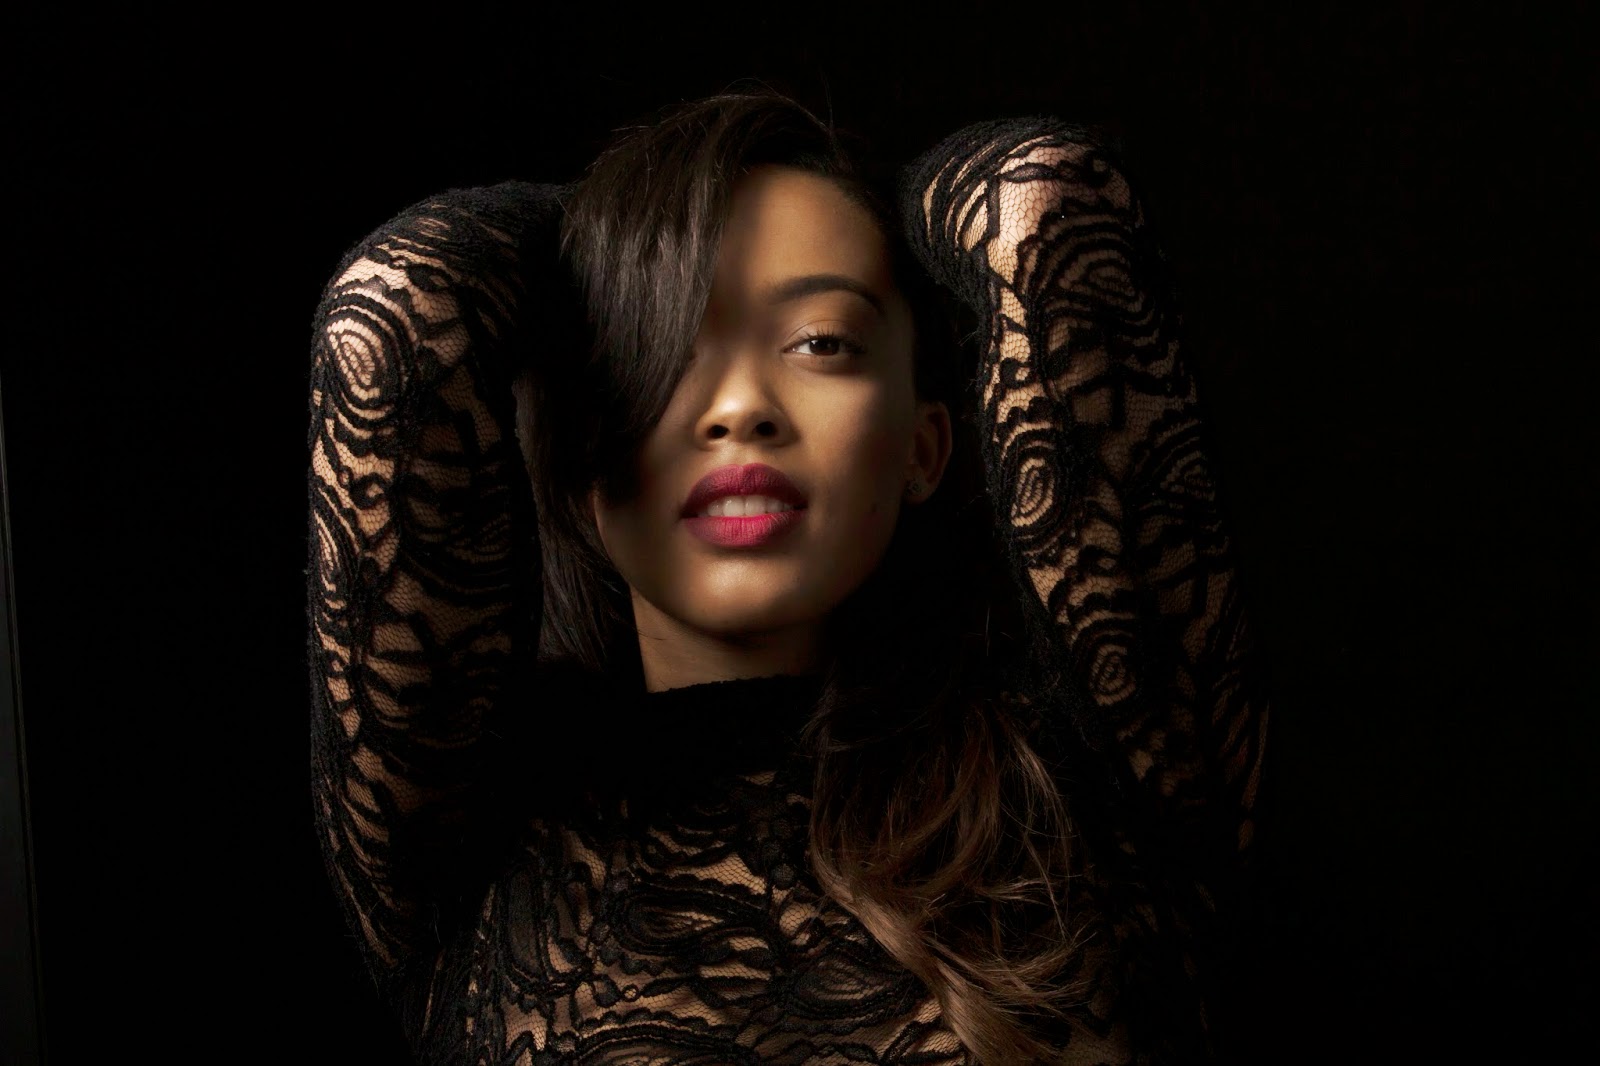
Low key lighting set ups are often used in portraiture and product photography and are perfect for accentuating the form and texture of a subject. 


Here is an example of some low key portraits I took for my portfolio:  


Thanks for reading ! Feel free to check out my website at: www.josephrigbyphotography.co.uk

High Key Lighting - Photography

High key Lighting

High key lighting is when a lighting set up is arranged so as to reduce the amount of contrast in the scene and achieve a balanced lighting ratio. High key lighting set ups generally bring with them an up beat feel and are usually focused on keeping the background with a similar exposure to the subject. 

Here is an example of a high key headshot I produced for Martin Minshall, based loosely on David Bowie’s Aladdin Sane album cover:


Thanks for reading ! Feel free to check out my website at: www.josephrigbyphotography.co.uk